

Disclaimer
| 0 comments

1. None of the files listed in this website are hosted on the server of yourstations.tk. All the files are hosted on external file hosts.
2. All the contents in this website are for personal use only.
3. If you’re member of any anti-piracy, government, corporation or related group or organization, you are not allowed to enter this site and view any of site contents.
4.Some videos and contents are to their respectful owners. No copyright infringement intended. Some videos are linked for youtube.com, justin.tv, ustream, etc.
yourstations claims no credit for any images featured on this site unless otherwise noted.
5. If you think any of the contents of this site infringes any intellectual property law and you hold the copyright of that content please report it to a.station84@yahoo.com the content will be removed as soon as posible.
The Passion of the Christ
| 0 comments

A depiction of the last twelve hours in the life of Jesus of Nazareth, on the day of his crucifixion in Jerusalem. The story opens in the Garden of Olives where Jesus has gone to pray after the Last Supper. Betrayed by Judas Iscariot, the controversial Jesus--who has performed 'miracles' and has publicly announced that he is 'the Son of God'--is arrested and taken back within the city walls of Jerusalem. There, the leaders of the Pharisees confront him with accusations of blasphemy; subsequently, his trial results with the leaders condemning him to his death. Jesus is brought before Pontius Pilate, the Roman Governor of Palestine, for his sentencing. Pilate listens to the accusations leveled at Jesus by the Pharisees. Realizing that his own decision will cause him to become embroiled in a political conflict, Pilate defers to King Herod in deciding the matter of how to persecute Jesus.

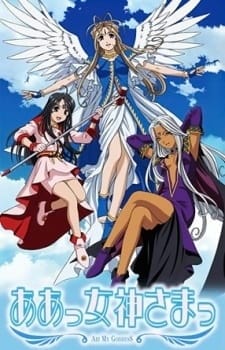
Ah! My Goddess S1 [Complete 1-26] | 80MB | 400p | Dual Audio
| 0 comments
Ah! My Goddess S1
Ah! My Goddess S1 [400p | Dual Audio]
Type: TV
Episodes: 26
Status: Finished Airing
Aired: Jan 7, 2005 to Jul 8, 2005
Producers: Bandai Visual, AIC, TBS, Media BlastersL
Genres: Comedy, Magic, Romance, Supernatural
Duration: 24 min. per episode
Rating: PG-13 – Teens 13 or older
Summary:
Keiichi Morisato is looking forward to university life. But in reality, he has no luck in anything, and he has trouble with clubs, love, etc. The truth is that he has an unlucky star above his head. One day, Keiichi is stuck watching the dorm while his sempai are away, and has a mountain of chores to do to boot. But Keiichi is a good-natured person, and is set about doing his duties. As he is about to finish his final chore, he makes a phone call to his sempai. But the words that came through the receiver are, 'Goddess Help Line.' Shortly afterwards, a beautiful goddess named Belldandy appears in front of him from the mirror of his room.
See instruction for subs at end
Download Links:
AOT Ah! My Goddess S1 26 400p dual audio.mkv
Instruction to use Subs
Instruction to use Subs
- download the sub file zip Click Here
- Extract all Episode subs
- load/open the sub tracks from it
New Hell striker for s60v3
| 0 comments

Game Testing:
Model: n95
New icon: World Road 2 red icon (Nice one, than the first test version of white fuzzy icon Shuai)
Genre: ARPG (and the SIS version of transplantation Paladin and some of them fight)
Landscape and white screen!
People like ninja .. very handsome, and Huo Ying endured years of Kakashi a bit like ...
Game size: 11Mb...22Mb after installed (more than the first test version is about 4M)
Game control: Wang Ping (volume can switch, but can not adjust the size of .. sorry ..)
Characters in dialogue, to play up Gengshuang!
.. So much time being tested ..
Working Fine On S60v3 All devices Like N95 And N73..
PREVIEW TRAILER
http://www.tudou.com/v/7WLTqwJ_MW4
Download Link:http://www.mediafire.com/?zdmegyizlkk

Quick Tip: How to Create an Abstract Wireframe Text Effect
| 0 comments
Tutorial Details
Program: Adobe Photoshop CS2+
Difficulty: Beginner
Estimated Completion Time: 20 Minutes
Step 1
Let’s start by creating a new document which is 900 px wide and and 600 px high at a resolution of 300 pixels/inch. Make sure the Color Mode is set to RGB.

Step 2
Fill the “Background” layer with Black. Get the Type Tool and type your text. I wrote “ABSENT”. I used Futura Md BT font, set Font Style to Medium and Font Size to 220 px. I also set the Tracking to 20 to increase the space between letters. Make sure the Text Color is set to White.

Step 3
While the text layer is selected on the Layers Palette, hit Command/Ctrl + E to merge the text and the "Background" layers.

Step 4
Now go to Filter > Distort > Wave and use these settings: Type: Square, Number of Generators: 1, Max Wavelength: 635, Min. Wavelength: 257, Max. Amplitude: 141, Min. Amplitude: 62, Horiz. Scale: 24% and Vert. Scale: 22%. Now you’ll have a pretty distorted text. Please keep in mind that the result depends on these parameters as well as the size, tracking and position of the text.

Step 5
We’ll add another displacement effect to our text and we’re going to use Fragment filter for that. Go to Filter > Pixelate > Fragment.

Step 6
Now go to Filter > Stylize > Glowing Edges, set Edge Width to 1, Edge Brightness to 6 and Smoothness to 1.

Step 7
We’re going to copy this image to a new alpha channel and make a selection out of it. First hit Command/Ctrl + A to select the whole layer, hit Command/Ctrl + C to copy. Then go to the Channels Panel create a new channel and hit Command/Ctrl + V to paste. Command/Ctrl-click on the Alpha 1 channel thumbnail to get the white pixels selected.

Step 8
Now go back to the Layers Panel. Create a new layer and name it "Text". Fill the selection with White, hit Command/Ctrl + D to deselect. Go to the "Background" layer and fill it with Black. Now we’ll apply a Layer Style to "Text" layer. Select the "Text" layer in the Layers Panel and apply a Gradient Overlay using these settings: Blend Mode set to Normal, Opacity set to 15%, Gradient set to Blue, Red, Yellow, Angle set to 140 and Scale at 150%. Select the “Background” layer in the Layers Panel and create a new layer. Select both “Layer 1″ and “Text” layers, hit Command/Ctrl + E to merge selected layers. Now the layer style we’ve just applied is merged with the layer.

Step 9
It is time to add some lighting effects now. Duplicate the “Text” layer by hitting Command/Ctrl + J. Go to Filter > Blur > Gaussian Blur and apply with a Radius of 4 pixels. Hit Command/Ctrl + J again to duplicate the “Text copy” layer. Set Blend Mode to Overlay and hit Command/Ctrl + J once again to duplicate the “Text copy 2″ layer.

Step 10
Select “Text copy” layer in the Layers Panel and duplicate it. Drag the “Text copy 4″ layer just above the “Background” layer. Go to Filter > Blur > Gaussian Blur and apply with a Radius of 6 pixels. Then go to Image > Adjustments > Hue/Saturation and use these settings: Colorize: Checked, Hue: 315, Saturation: 38 and Lightness: -30.

Step 11
Now we’ll create the background. Create a new layer above the “Background” layer and name it “Lights”. Get the Gradient Tool, pick Foreground to Transparent and set to Radial Graident. Zoom out and apply gradients starting from outside the canvas as shown in the below image. You can use the colors shown below as well as you can pick your own.

Step 12
Create a new layer above the “Lights” layer and name it "Circles". Get the Brush Tool, pick one of the standart round brushes and open the Brushes Panel and change the settings as shown below.

Step 13
Set Foreground Color to #3fc5c6 and Background Color to #ad4cb1. Paint the "Circles" layer with random brush moves.

Step 14
Now go to Filter > Blur > Surface Blur, set Radius to 25 pixels, set Threshold to 175 levels and apply. Then go to Filter > Blur > Gaussian Blur and apply with a Radius of 4 pixels.

Step 15
Set the Opacity of the “Circles” layer to 15 and this is what we have so far.

Step 16
Finally, we’ll add some text to our design. I placed a clear "ABSENT" text and a subhead text using the same font we’ve used before.

Final Image
Here is the final image. I hope you liked this tutorial and the techniques you learned will come in handy for your own designs.

Subscribe to:
Comments (Atom)